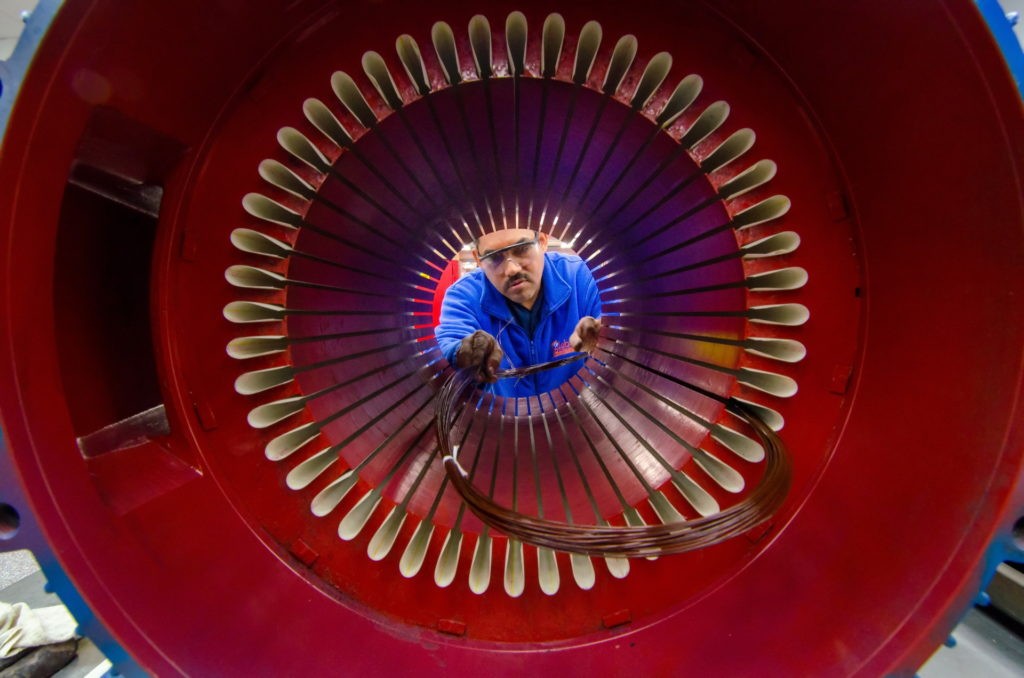
Motor Rewinding

While electric motors power valuable equipment and make life easier, rewinding them can be a difficult job. Depending on the number of phases and the brand, motors need to be rewound in different patterns. As these patterns are often complicated and difficult to follow, motor rewinding needs to be performed very carefully and is usually best left to a practiced professional.
The Motor Rewinding Process
Rewinding a motor is a complicated process involving many steps:
Step 1: Motor Disassembly
This stage begins with the removal of the motor from its outer housing. After you can see the motor’s internal components, take careful note of its exact configuration in order to reassemble it correctly. Always wear gloves to protect your hands from oil and any other fluids or sharp features that could potentially harm your skin. Be exceptionally careful not to damage any part of the motor during its disassembly.
Step 2: Removal of the Outer Windings
Carefully pry open all of the tabs that hold the brush pad in place. This action can be performed with a flat head screwdriver, and there can be anywhere from 12 to 16 tabs total. Tabs are not easy to replace once broken, so use caution when opening and closing them.
Using a pair of wire cutters, you should be able to cut the old wiring free from the motor. Snip the protruding coils of wire attached to the top of the post to free it from the motor. As you cut, make sure to count the winds present in every coil so you can build it back in the same configuration.
After you’ve cut every wire from inside the motor, the old windings should come out with a firm but not aggressive pull of your hand. If the coil does not come out after the first couple of pulls, check the motor and cut any remaining wires. Depending on the state of the insulation paper within the motor, you may need to remeasure and replace it. Do not install new winding insulation without insulation paper under any circumstances.
Step 3: New Winding Installation
When installing new winding, make sure you choose the same gauge of wire as that you’re removing. If you cannot determine the wire gauge based on the original, choose one size larger than you expect. Oversize wiring risks slowing down the motor slightly, but wiring that is too thin risks overheating and becoming a safety hazard. With the correct wire on hand, carefully recreate the winding pattern from the original configuration.
If you are unfamiliar with the winding pattern and lack experience, consult a professional instead of attempting to rewind the motor yourself. If you’re comfortable completing the task on your own, use the tabs around the stator to secure the windings once you finish, then connect all loose ends and reassemble the motor.
Rewind Your Motor With Global Electronic Services
Whether rewinding a motor or replacing it altogether, Global Electronic Services offers the repair capabilities, motors and parts your business needs. Each of our products comes with an 18-month warranty and arrives at your business in five days or less. In a pinch, we even offer rush services to deliver motor parts in one to two days.
If rewinding motors has proved a challenge for your business, reach out to our professional technicians and experts to get your motor back up and running. Call us anytime at 877-249-1701 or request a free quote today.
