Danaher Eagle Signal Timer Component Level Repair

This article details the step-by-step process of repairing an analog Danaher Eagle signal timer down to the component level, but be sure to check out our YouTube video to see the process in action.
- We have an analog Eagle timer that is in need of repairs, with the most common problem being the connector ring that breaks with normal wear and tear.
- The technician starts the repair by hooking up the unit to 120V A/C and engaging the relay to start counting.
- This test of the motor reveals that it checks out fine, so the technician needs to take the counter apart to look for the problem.
- After taking it out of the case, the technician notices the connector ring is in bad shape and needs replacing.
- Before ring replacement, the technician creates a wiring diagram to know how to put the pins back into the new connector ring.
- Next, the technician cleans the contacts and realigns the external relay.
- He tests that the gap to make sure the contact between the normally open and normally closed is good, which it is.
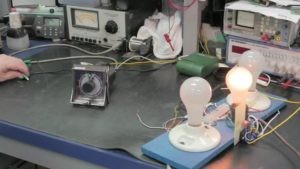
- He also replaces the outer bezel for aesthetic purposes and uses common bulb lights to simulate a load on the timer.
- If the light comes on at the end of the 60-second interval, then we know the timer’s signal is engaging.
- Everything is working appropriately, so the unit can be cleaned and shipped back!
Don’t hesitate to leave any questions or concerns you may have in the comments section below, and head over to gesrepair.com if you’re ready to get the repair process started on your analog Eagle signal timer.
